Descripción
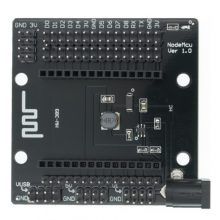
El ESP32 es la evolución del ESP8266, procesadores ambos diseñados específicamente para IoT (Internet-of-Things, el Internet de las cosas). El ESP32 cuenta con más potencia de cálculo y opciones de conectividad e interfaz ampliadas respecto del ESP8266.
Características:
- Alimentación a 3,3 V (pin de entrada 3V3) y 5 V (pin de entrada VIN, 4-12V).
- 2,4GHz Dual-Mode Wifi + Bluetooth 4.0 (ESP-WROOM-32)
- Modos Bluetooth: Classic y BLE
- Antena integrada
- Admite protocolo LWIP, freeros
- Modos de funcionamiento: AP, STA y AP + STA
- Procesador: Doble núcleo 160Mhz (32bits)
- RAM: 512 KB
- ADC: 12bits (x18)
- DAC: 8bits (x2)
- GPIO: Hasta 32
- Salidas PWM
- Entrada para sensor capacitivo
- Comunicaciones serie: UART, SPI, i2c, i2s, CAN
- Se puede programar con el IDE de Arduino
- Dimensiones de placa: 28 x 58 x 12 mm
- Conector micro-USB
- Pines no soldados
Para poder programar tu placa ESP32 desde el IDE de Arduino debes configurar lo siguiente:
- Añadir la tarjeta ESP32 a Arduino IDE: Lo que haremos desde «Archivo – Preferencias – Ajustes – Gestor URLs Adicionales de Tarjetas» y añadimos la siguiente URL: «https://dl.espressif.com/dl/package_esp32_index.json» (sin comillas).
- Instalar la tarjeta ESP32: desde «Herramientas – Placa – Gestor de tarjetas» buscaremos «ESP32» y hacemos click en «Instalar».
- Seleccionar la placa ESP32 Dev Module (funciona bien con ésta) del menú Herramientas y el puerto correspondiente.
- Atención: para subir el programa debe mantenerse presionado el pulsador «boot». Tras una programación exitosa, debe resetearse la placa (presionando «EN» o desconectándolo y volviéndolo a conectar).
Ejemplo 1: Hacer parpadear un LED
#define LED 2 // Pin al que está conectado el LED de la placa
void setup() {
  pinMode(LED,OUTPUT); // Configurar el pin del LED como salida
}
void loop() {
  delay(500);
  digitalWrite(LED,HIGH); // Enciende LED
  delay(500);
  digitalWrite(LED,LOW);  // Apaga LED
}
Ejemplo 2: conexión Bluetooth classic
// Basado en el ejemplo de Daniel Carrasco -> https://www.electrosoftcloud.com/
// Una vez programado, para enviar un dato puede usarse desde el móvil cualquier aplicación de monitor serie por
// bluetooth. Nosotros hemos usado "Serial Bluetoot Terminal".
// Si todo funciona correctamente, se mostrará en el monitor serie de Arduino aquello que tecleemos desde el móvil.

#include "BluetoothSerial.h"
#if !defined(CONFIG_BT_ENABLED) || !defined(CONFIG_BLUEDROID_ENABLED)
#error Bluetooth is not enabled! Please run `make menuconfig` to and enable it
#endif

BluetoothSerial BT; // Objeto Bluetooth
void setup() {
  Serial.begin(9600); // Puerto serie a 9600bps
  BT.begin("ESP32_BT_classic"); // Nombre Bluetooth del ESP32
  Serial.println("Dispositivo Bluetooth está listo para emparejarse...");
}
void loop() {
  if (BT.available()){ // Si se recibe algo por Bluetooth...
    int incoming = BT.read(); // Lee lo que recibimos
    Serial.print("Recibido: ");
    Serial.println(incoming); // Muestra en el puerto serie el dato recibido
}
  delay(20);
}
Ejemplo 3: Bluetooth Low-energy (BLE)
// Este ejemplo, copiado de la librería del ESP32 que tienes en Arduino IDE, permite comprobar el funcionamiento
// del ESP32 en modo Bluetooth LE.
// En el terminal serie del móvil deberás buscar el dispositivo en la pestaña "Bluetooth LE".
/*
Video: https://www.youtube.com/watch?v=oCMOYS71NIU
Based on Neil Kolban example for IDF: https://github.com/nkolban/esp32-snippets/blob/master/cpp_utils/tests/BLE%20Tests/SampleNotify.cpp
Ported to Arduino ESP32 by Evandro Copercini

Create a BLE server that, once we receive a connection, will send periodic notifications.
The service advertises itself as: 6E400001-B5A3-F393-E0A9-E50E24DCCA9E
Has a characteristic of: 6E400002-B5A3-F393-E0A9-E50E24DCCA9E - used for receiving data with "WRITE"
Has a characteristic of: 6E400003-B5A3-F393-E0A9-E50E24DCCA9E - used to send data with "NOTIFY"

The design of creating the BLE server is:
1. Create a BLE Server
2. Create a BLE Service
3. Create a BLE Characteristic on the Service
4. Create a BLE Descriptor on the characteristic
5. Start the service.
6. Start advertising.

In this example rxValue is the data received (only accessible inside that function).
And txValue is the data to be sent, in this example just a byte incremented every second.
*/
#include <BLEDevice.h>
#include <BLEServer.h>
#include <BLEUtils.h>
#include <BLE2902.h>

BLEServer *pServer = NULL;
BLECharacteristic * pTxCharacteristic;
bool deviceConnected = false;
bool oldDeviceConnected = false;
uint8_t txValue = 0;

// See the following for generating UUIDs:
// https://www.uuidgenerator.net/

#define SERVICE_UUID "6E400001-B5A3-F393-E0A9-E50E24DCCA9E" // UART service UUID
#define CHARACTERISTIC_UUID_RX "6E400002-B5A3-F393-E0A9-E50E24DCCA9E"
#define CHARACTERISTIC_UUID_TX "6E400003-B5A3-F393-E0A9-E50E24DCCA9E"


class MyServerCallbacks: public BLEServerCallbacks {
void onConnect(BLEServer* pServer) {
deviceConnected = true;
};

void onDisconnect(BLEServer* pServer) {
deviceConnected = false;
}
};

class MyCallbacks: public BLECharacteristicCallbacks {
void onWrite(BLECharacteristic *pCharacteristic) {
std::string rxValue = pCharacteristic->getValue();

if (rxValue.length() > 0) {
Serial.println("*********");
Serial.print("Received Value: ");
for (int i = 0; i < rxValue.length(); i++)
Serial.print(rxValue[i]);

Serial.println();
Serial.println("*********");
}
}
};


void setup() {
Serial.begin(115200);

// Create the BLE Device
BLEDevice::init("UART Service");

// Create the BLE Server
pServer = BLEDevice::createServer();
pServer->setCallbacks(new MyServerCallbacks());

// Create the BLE Service
BLEService *pService = pServer->createService(SERVICE_UUID);

// Create a BLE Characteristic
pTxCharacteristic = pService->createCharacteristic(
CHARACTERISTIC_UUID_TX,
BLECharacteristic::PROPERTY_NOTIFY
);

pTxCharacteristic->addDescriptor(new BLE2902());

BLECharacteristic * pRxCharacteristic = pService->createCharacteristic(
CHARACTERISTIC_UUID_RX,
BLECharacteristic::PROPERTY_WRITE
);

pRxCharacteristic->setCallbacks(new MyCallbacks());

// Start the service
pService->start();

// Start advertising
pServer->getAdvertising()->start();
Serial.println("Waiting a client connection to notify...");
}

void loop() {

if (deviceConnected) {
pTxCharacteristic->setValue(&txValue, 1);
pTxCharacteristic->notify();
txValue++;
delay(10); // bluetooth stack will go into congestion, if too many packets are sent
}

// disconnecting
if (!deviceConnected && oldDeviceConnected) {
delay(500); // give the bluetooth stack the chance to get things ready
pServer->startAdvertising(); // restart advertising
Serial.println("start advertising");
oldDeviceConnected = deviceConnected;
}
// connecting
if (deviceConnected && !oldDeviceConnected) {
// do stuff here on connecting
oldDeviceConnected = deviceConnected;
}
}
Atención: Tras una desconexión bluetooth, para volver a conectar la placa debe resetearse (presionando «EN» o desconectándola y volviéndola a conectar).


Valoraciones
No hay valoraciones aún.